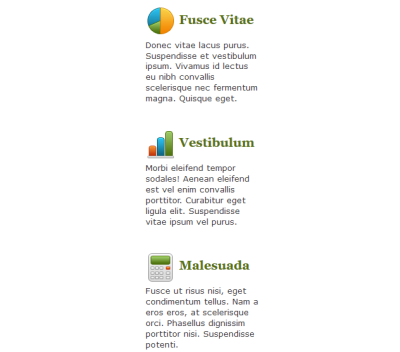
Align elements one after another if their total width is less than browser width
In mobile layout, elements are placed one after another vertically. Select this option will align the elements one after another if their total width is less than the width of the browser window.
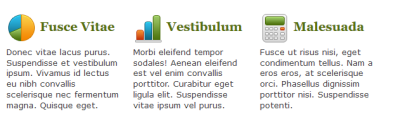
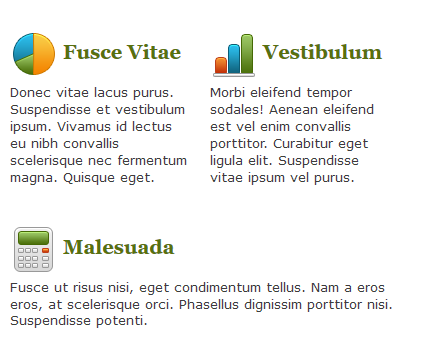
If the total width of the elements in this group exceeds the width of the browser window, the elements will be aligned vertically. Select this options will reduce the size of each element and let them fit within the width of the browser window until the width reaches the specified pixels (px) where elements will be expanded to the window width on separate rows. Using the above as example, it will looks like below and since the pixel value is zero, they will not be expanded to browser window width. If this value is changed to 500 px for example, they will be expanded when the width of the browser window is 500 or below.
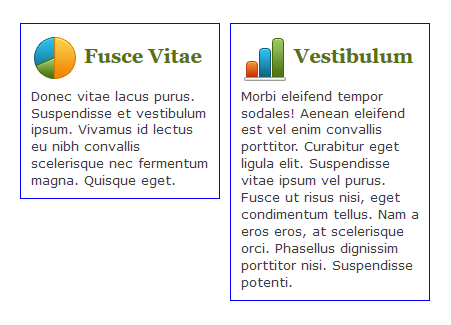
Expand all elements in the group to browser window width if wrapping occurs
When the total width of the elements in this group exceeds the width of the browser window, elements will wrap to next line and expand to the width of the browser window. It will looks like below when using the above as example:
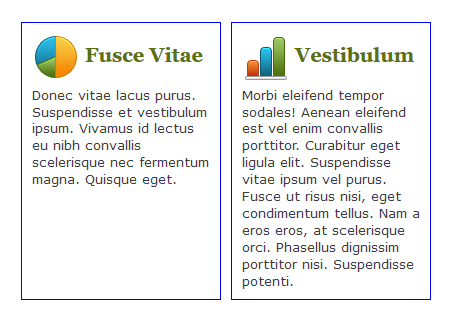
Expand elements in the group one by one to browser window width when wrapping occurs
Rather than expand all the elements at once, expand them one by one. The following example shows that the total width of the first two elements are still within the width of the browser window so they are still on the same row and only the third element is expanded.
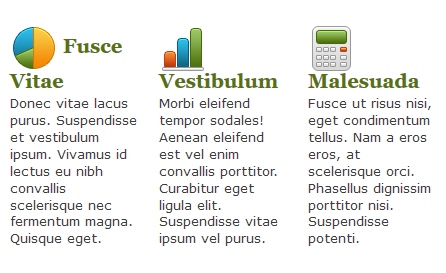
Make all text elements to grab excess horizontal space
Make the text elements in this group to group the excess horizontal space if all the elements in this group are all text elements. The example below shows the effect.