×
Menu
Index

Image Properties Dialog

Image Properties Dialog
1

Link tab

1. Link tab
2

Image File

2. Image File
Select image file from the website.
3

Import Button

3. Import Button
Import external image file.
4

Alternate Text

4. Alternate Text
Enter text to describe the image.
5

Original Image Size

5. Original Image Size
Show the original size of the image.
6

Custom Image Size

6. Custom Image Size
Set the size of the image.
7

Keep aspect ratio

7. Keep aspect ratio
Select this option to keep the size in aspect ratio when custom width and height are used.
8

Use data URI

8. Use data URI
Convert the image to Base64 and embed it in HTML file. For example, like converting
 
from:
<img src="images/img.png" />;
 
to:
<img src="data:image/png;base64,iVBORw0KGgoAAAANSUhEUgAAAAUAAATNm/RAAAAH0lE5MgAAAABJRU5ErkJggg==" />;
 
The image will be compressed first before conversion to make it smaller. Embed small images only and avoid embedding large images as this will increase the size of the page. A Base64 encoded image is about 30% larger than the original one. Your page may be able to load faster as there is no extra http request to get the image.
 
9

Use responsive images

9. Use responsive images
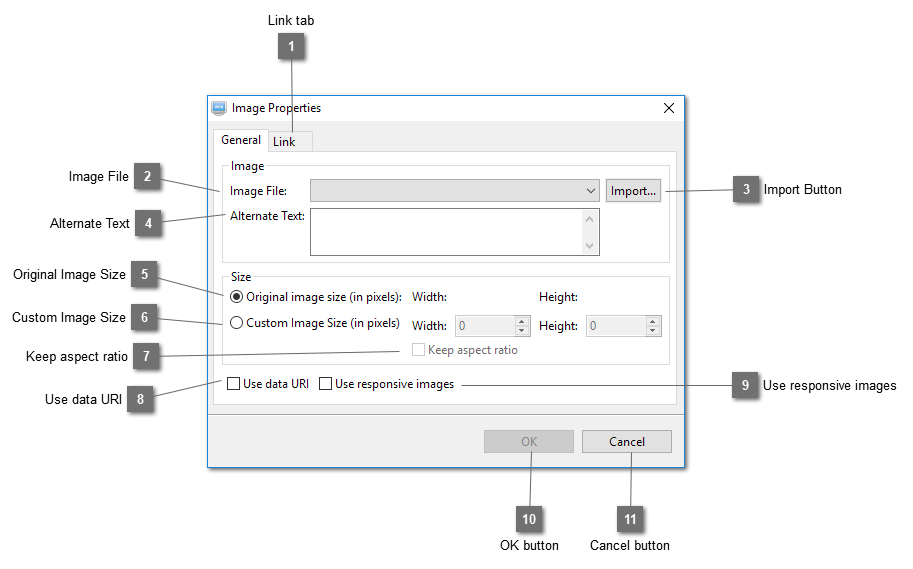
Use responsive images for this image. A set of smaller images using the sizes specified in the Preference will be created from this image. Browsers will choose the appropriate image to load according to the width of the browser window. For example, if the page is loaded in a mobile device with browser window width of 320px, the image with width 320px will be loaded instead of the original one so that the page will be loaded more faster.
10

OK button

10. OK button
Click OK to insert the image to the current cell.
11

Cancel button

11. Cancel button
Cancel inserting image.