Select this option to let the program determine automatically what layout strategies to use. Owing to the dynamic nature of a web page. It is most likely that the strategies determined are not appropriate. Deselect this option will show what options have been determined automatically without considering its relationship with the surrounding elements. You can then customize your settings.
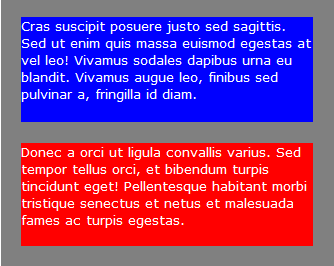
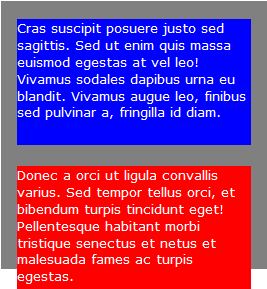
Increase the height of the containing element when the height of the contained elements are increased. For example, a blue and a red box are stacked on another gray box as shown in the first image below. When the width of the page they are on is decreasing, the increasing height of both boxes makes the red box overflows the gray box as shown in the second image. Select this option on the gray box will result in the third image. The gray box will expand to include the increasing height of both boxes.
Include the increasing height of the containing element when moving downward
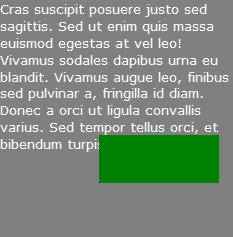
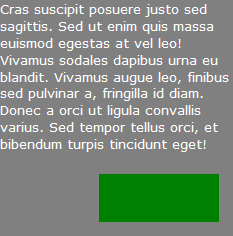
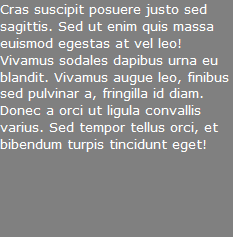
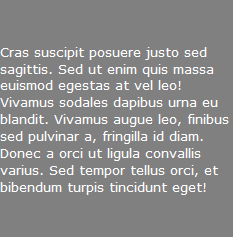
Consider the situation below. The green box is placed above the gray box as shown in the first image. When the page is decreasing, the height of the gray box is increasing to accommodate the text. As the green box is over the gray box, the increasing height of the gray box will not affect the green box as shown in the second image. Select this option in the green box will make it take into account the increasing height of the gray box as shown in the third image below.
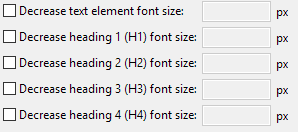
Decrease the font size of the text element and the headings. These option works only if the font size is set in the CSS Style Editor and is applied to the text element or the headings.